Managing Tags
Automatically Generate Tags
Within the Product Configuration section, you can enable the automatic generation of new tags. This option is located beneath the name of your product.
- Fewer than 10 Tags: New tags will be generated automatically regardless of this setting.
- 10 or More Tags: New tags will be generated during feedback processing only if this option is enabled.
Newly generated tags will be marked as pending and must be approved in the Tag Management section.
Find New Tags
To discover new tags, navigate to the Tag Management page. Here, you can generate new tags by selecting the option under the context menu of the More... button. This function will scan all your feedback to identify potential new tags.
Reassign Missing Tags
In the Tag Management section, you can reassign missing tags by selecting the option under the context menu of the More... button. This action will assign a tag to all statements that currently lack one.
Reassign All Tags
The Tag Management page also provides an option to reassign all tags via the context menu of the More... button. This function will assign new tags to all your statements, regardless of whether they already have a tag assigned. This feature is particularly useful if numerous new tags have been created after your feedback was initially processed.
Merging Tags
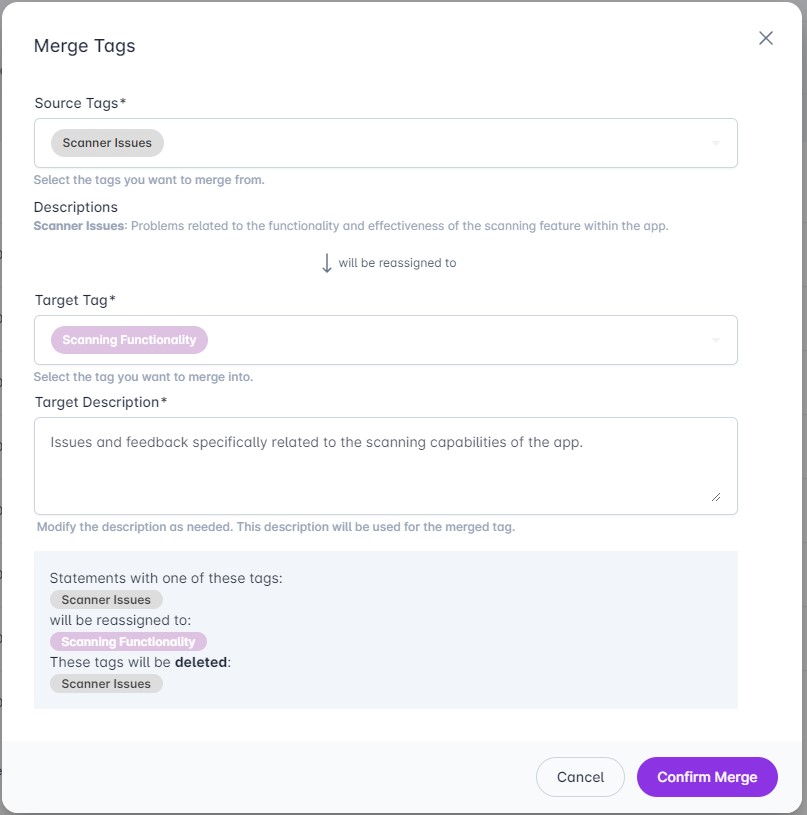
When similar tags exist, you can streamline your tagging system by merging them. This feature allows you to consolidate one or more source tags into a single target tag. Statements originally assigned to any of the source tags will be reassigned to the target tag, and the source tags will be deleted thereafter.
Ensure that the description of the target tag is sufficiently broad to encompass the meanings of the source tags before merging.
How to Merge Tags
Example Scenario: Suppose you have the tags Push Notification, Notifications, and Notification Content. These tags are closely related and represent the same topic. To streamline your tagging system, you decide to merge them into a single tag, retaining only one.
Follow these steps to merge tags effectively:
-
Initiate Merge:
- Navigate to the Tag Management section.
- Click the
More...button and selectMerge Tags. - Alternatively, click the merge icon (
Open Merge Dialog) next to any of the tags you wish to merge, such asPush Notification.
-
Select Source Tags:
- In the dialog that appears, select one or more source tags you intend to merge. For example, choose
Push NotificationandNotifications. - The descriptions of the selected tags will be displayed below the selection box for reference.
- In the dialog that appears, select one or more source tags you intend to merge. For example, choose
-
Select Target Tag:
- Choose the target tag that will absorb the source tags. For instance, select
Notification Content. - This means all statements previously tagged with
Push NotificationandNotificationswill now be associated withNotification Content.
- Choose the target tag that will absorb the source tags. For instance, select
-
Update Description:
-
Modify the description of the target tag to ensure it encompasses the scope of all source tags. These are the existing descriptions in our example:
- Push Notification: Feedback related to push notifications.
- Notifications: Feedback related to notifications.
- Notification Content: Feedback related to the content of push notifications.
Update the description of
Notification Contentto a more general statement such as "Feedback related to push notifications."
-
-
Review Summary:
- The dialog will display a summary of the merge, showing which tags will be merged into the target tag and which source tags will be deleted.
-
Finalize Merge:
- Confirm the merge to reassign statements and delete the source tags.
-
(Optional) Rename the Target Tag:
- After a successful merge, you might want to rename the target tag for clarity. For example, change
Notification ContenttoNotificationsto better reflect the consolidated category. - To do this, locate the merged tag in the Tag Management section, select the edit option, and update the tag name accordingly.
- After a successful merge, you might want to rename the target tag for clarity. For example, change

Splitting Tags
If a single tag is assigned to a large number of statements, it may indicate that the category is too broad. While direct splitting of tags is not currently supported, you can achieve this through the following steps:
How to Split Tags
Example Scenario: Splitting the Notifications tag into Notification Settings and Notification Content.
-
Create a New Tag:
- Create a new tag with a more specific name and description, such as
Notification Settings.
- Create a new tag with a more specific name and description, such as
-
Remove Existing Tag from Statements:
- In the Tag Management section, locate the
Notificationstag. - Select the
Remove Tag from all Statementsoption from the context menu. This will unassign theNotificationstag from all associated statements.
- In the Tag Management section, locate the
-
Update Existing Tag:
- Rename the existing
Notificationstag toNotification Content. - Update its description to reflect the more specific focus.
- Rename the existing
-
Reassign Missing Tags:
- Use the
Reassign Missing Tagsfunction found under theMore...button at the bottom of the tag table. This will assign the appropriate tags to statements that are now missing them.
- Use the
The Remove Tag from all Statements function can be utilized independently of creating new tags. This can be particularly useful for general tags with a large number of associated statements, such as User Experience, especially when new, more specific tags have been introduced in subsequent processes.